
Retrieving Newforma Konekt Perspective View Issues in Revit
4 minutes
10 months ago
When retrieving perspective view issues that were published from Navisworks in Revit, it is important to change the view state to orthographic so that the issues can be more easily manipulated.
In this article, you’ll learn how to use a section box to get a more workable view to retrieve issues in Revit.
If you are working in Navisworks, see Save and Restore Section Box to help Revit users work on your issues.
Related: Check out our blog post on mastering views in Revit for ultimate issue visibility.
Things to know
- There are two types of 3D views in Revit: Perspective and Orthographic. For more information, see Orthographic vs. Perspective Views.
- When you use the View in model feature in Revit, you are looking at a view that was created by Newforma Konekt called BIMTrack Perspective Camera or BIMTrack Orthogonal View.
- A perspective view issue in Newforma Konekt can either contain related elements or no related elements (see Changing an issue view from perspective to orthographic).
- It is recommended to create view templates for the Newforma Konekt views to ensure issues are not hidden by certain elements. You can have individual templates, or use the same template for each.
Changing an issue view from perspective to orthographic
As a Revit user, you can see issues in an orthographic view state by using Revit’s section boxes. To do so, follow the instructions below or watch our short video.
- In Revit, open the desired model.
- In the ribbon, click Newforma Konekt tab > Open Newforma Konekt.
- In the Newforma Konekt panel, click Sign In, then from the browser tab that opens, enter your credentials and click Sign In.
- Back in Revit, select a hub and a project.
- Find the desired perspective view issue and click View in model. You may be taken to the BIMTrack Perspective Camera because that was the view state the user was in when the issue was created.
If you are taken to the BIMTrack Orthogonal View, skip to step 8. - If you open a perspective view and the issue contains related elements, proceed as follows:
- In the Revit ribbon, click the Newforma Konekt tab > Settings.
- In the dialog that opens, make sure the Force section box around related elements and Force orthographic view if there is a section box or related elements options are enabled.
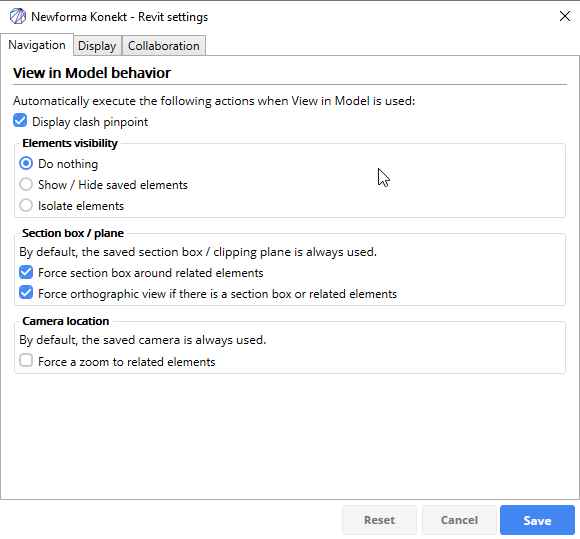
- Click Save. When you use the View in model, this will take you directly to the BIMTrack Orthogonal View.
- If you open a perspective view and the issue has no related element, proceed as follows:
- Select the element(s) to be encompassed in a section box.
- Then, click the File tab > View panel > Selection Box (default shortcut keys:BX) to section your selected element(s). You’ll be taken to the default 3D view, where you can orbit freely, resize the section box to get more context on the issue, or simply examine our issue in question.
- In the Newforma Konekt panel, right-click on the issue or click the three dots at the end of the issue name and then select Viewpoint > Add from current view. Now the issue contains multiple selectable preview images. You can easily switch back and forth from one preview image to the other.
- Make this new orthographic view the default image and view state by clicking the View / Edit button, navigate with the white arrow to your recently added view, and click the Set as default viewpoint button, then Publish. The next time you click the View in Model button, you’ll be taken directly to the BIMTrack Orthogonal View.
- You can now apply the above mentioned Newforma Konekt view templates that you created to either of the views Newforma Konekt has created for you (see Create a View Template).