
Manage Viewpoints
Viewpoints can also be managed via the issue details page. Using the viewpoint control buttons, you can annotate the image, add an image, delete & replace existing viewpoints. A viewpoint can also be set as default meaning that this is the image that will be displayed in the issues page. This is also the image that will appear in the reports.
The viewpoint of an issue can be created from multiple platforms in a variety of camera styles (plan/section/perspective/orthographic). Depending on the software used, it may be convenient to add, update, annotate, or change the default viewpoint of an issue. Let’s walk-through an example revolving as issue that was created on the Online viewer in a perspective camera mode.
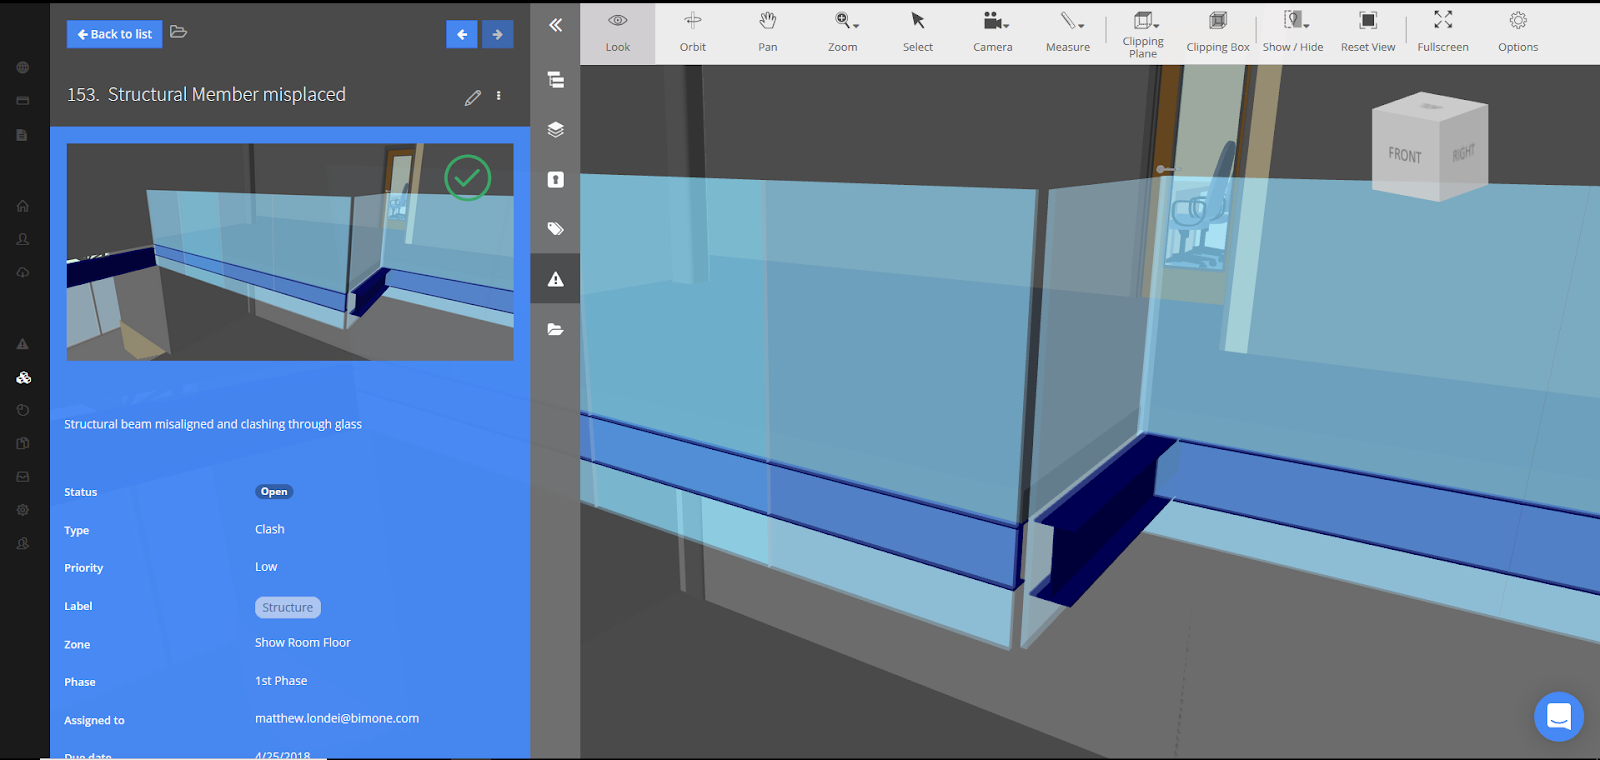
Here is the issue:
Adding a viewpoint
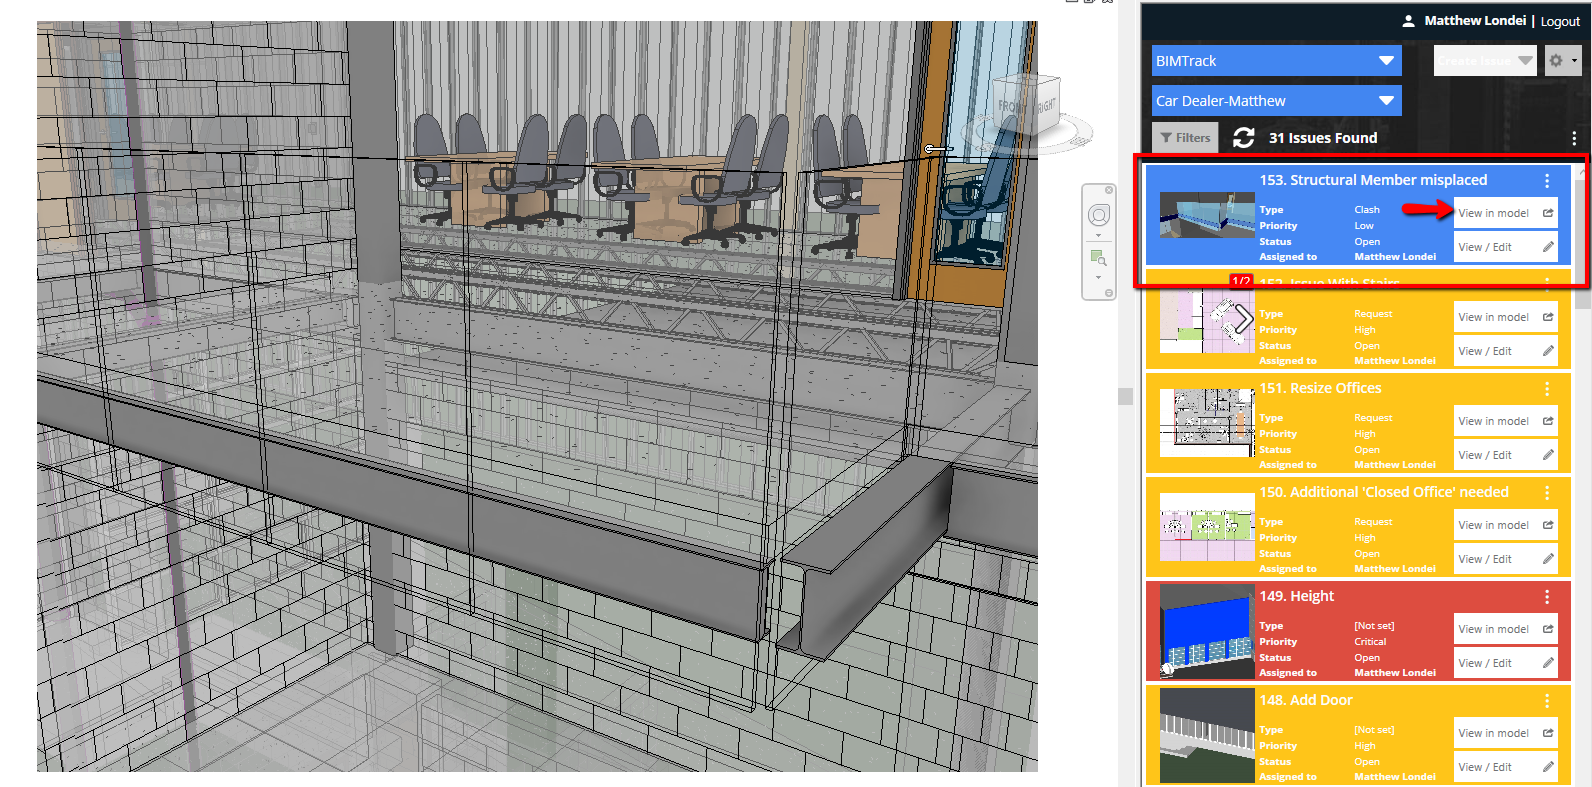
In Revit upon clicking the View in model command, we are taken to the same location and presented with an identical perspective shot of the issue.
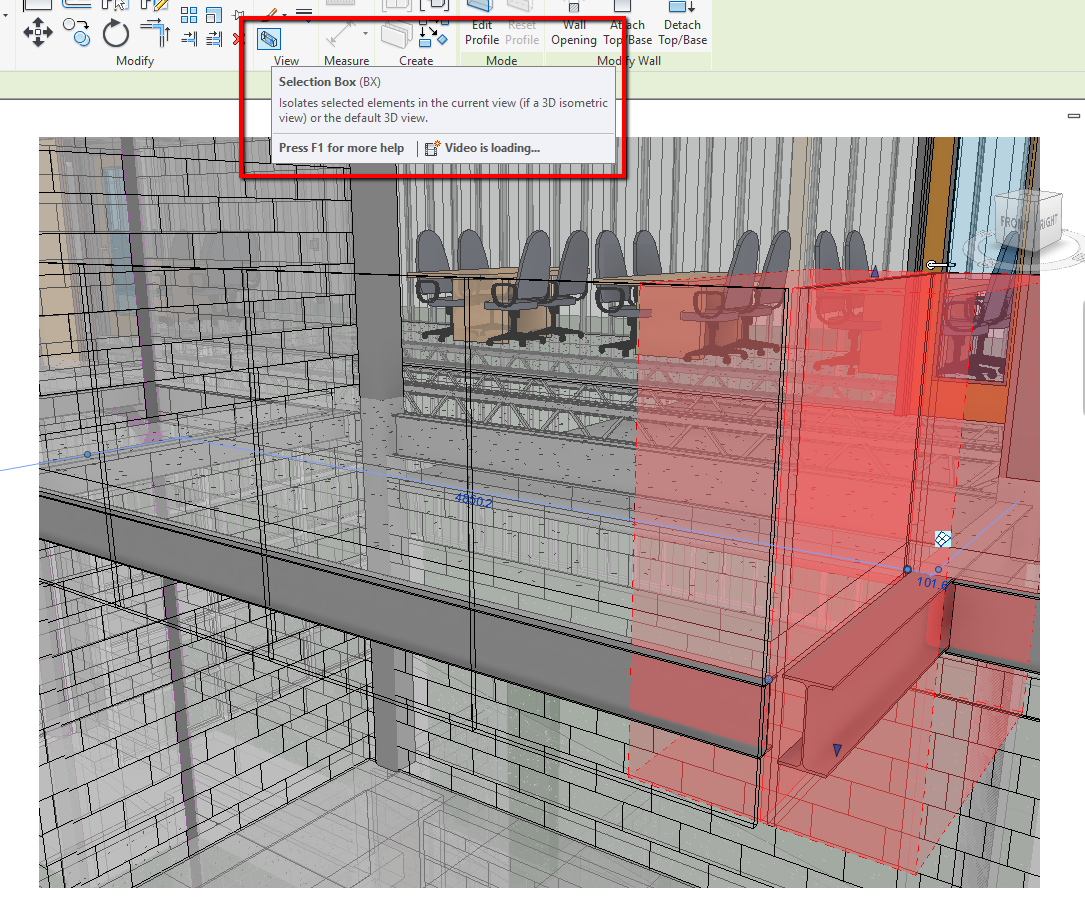
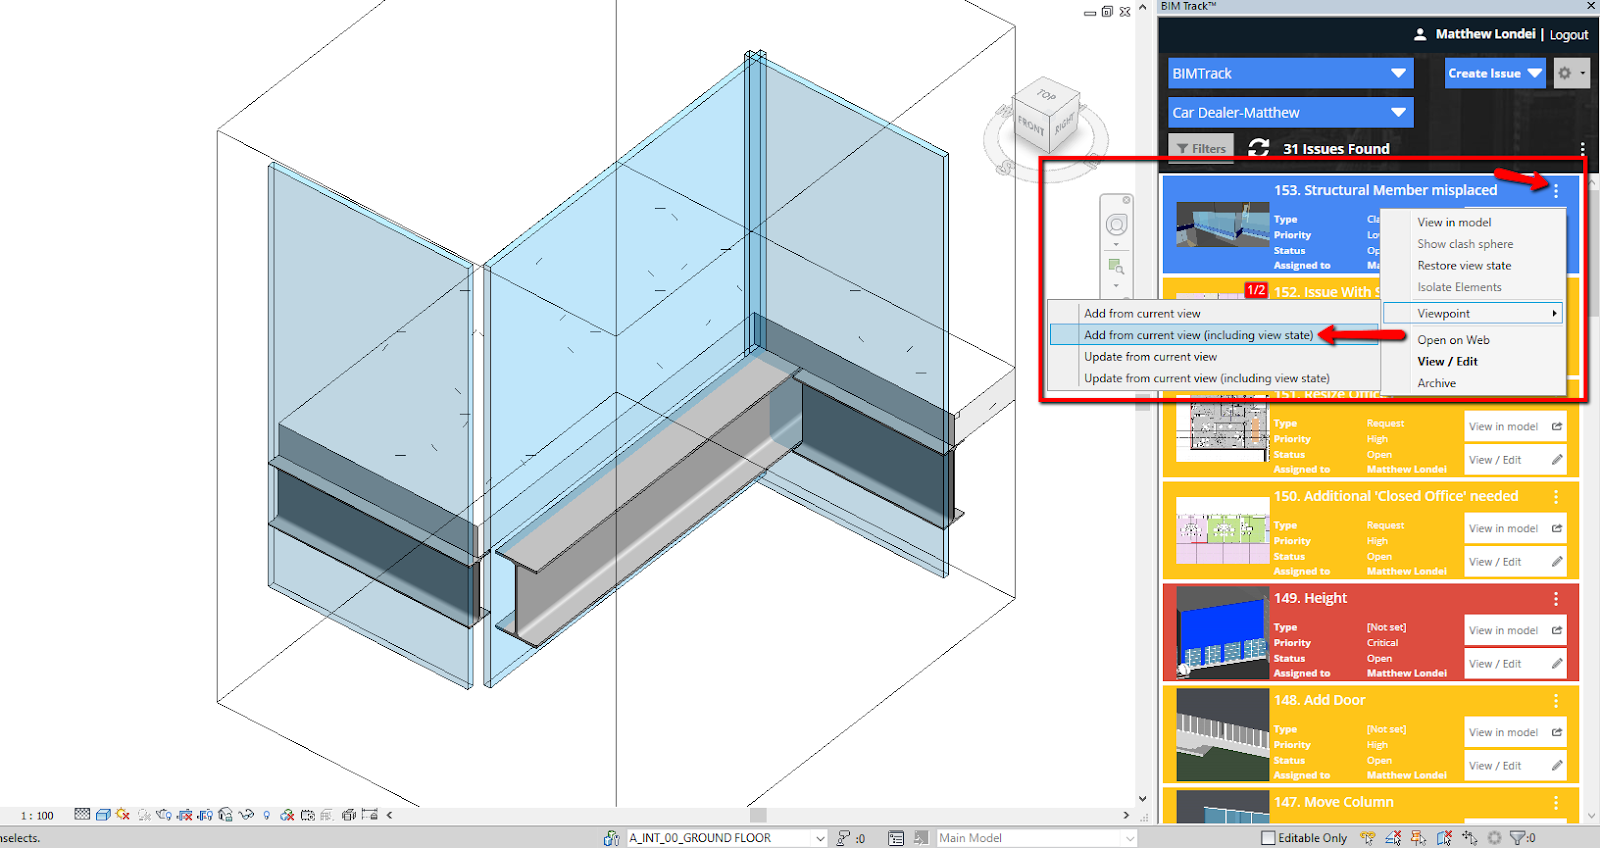
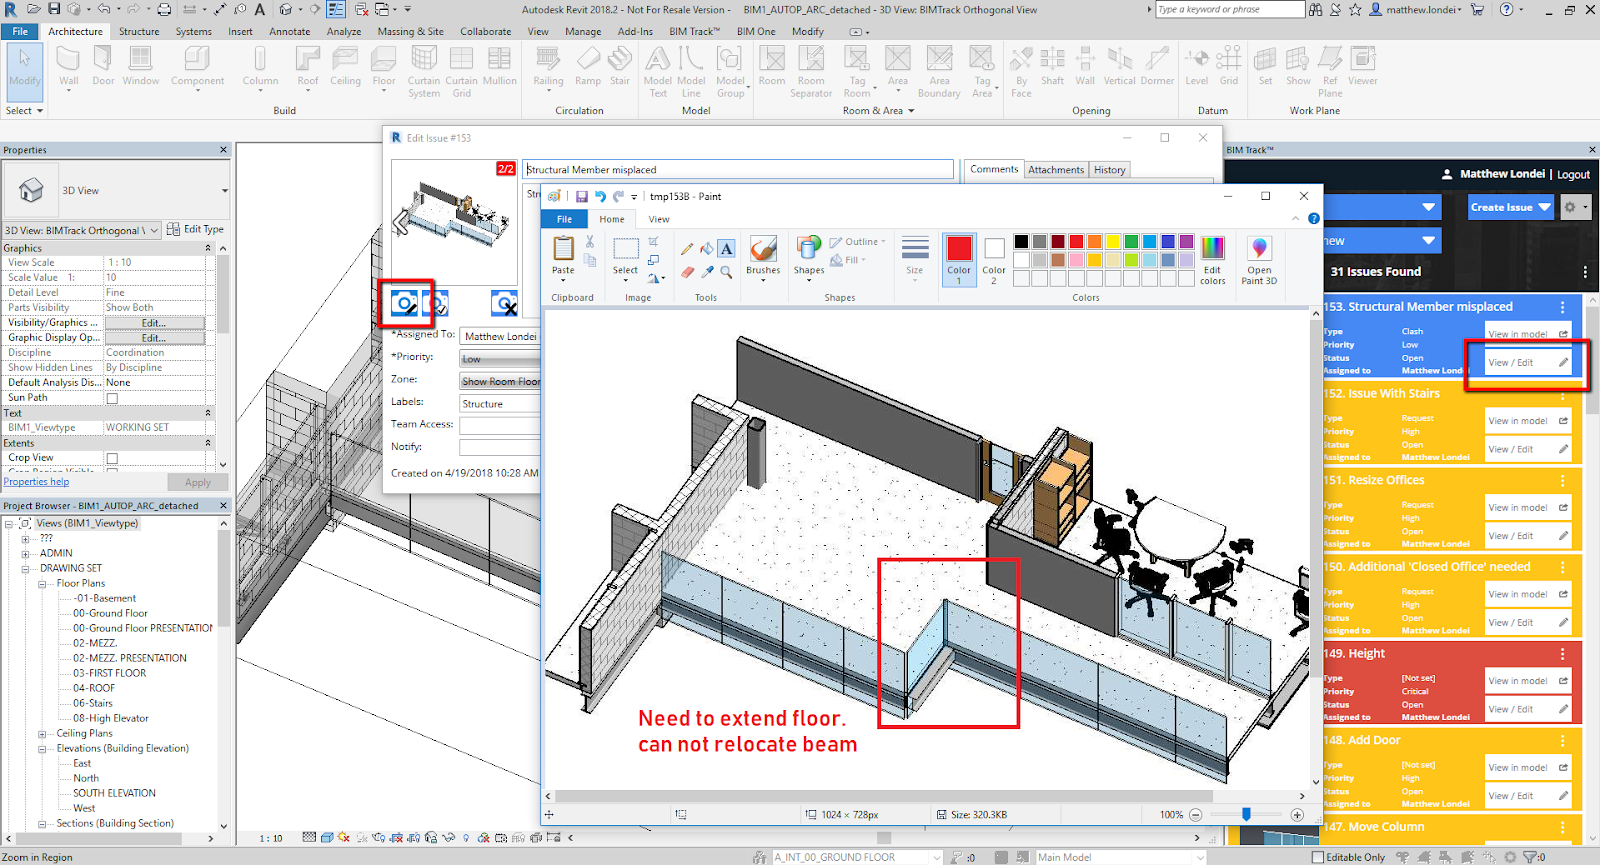
In this view it is difficult to see the issue clearly, and it would be much easier to work in a orthographic view. By selecting an element and clicking Selection Box we are automatically taken to a new 3D view:
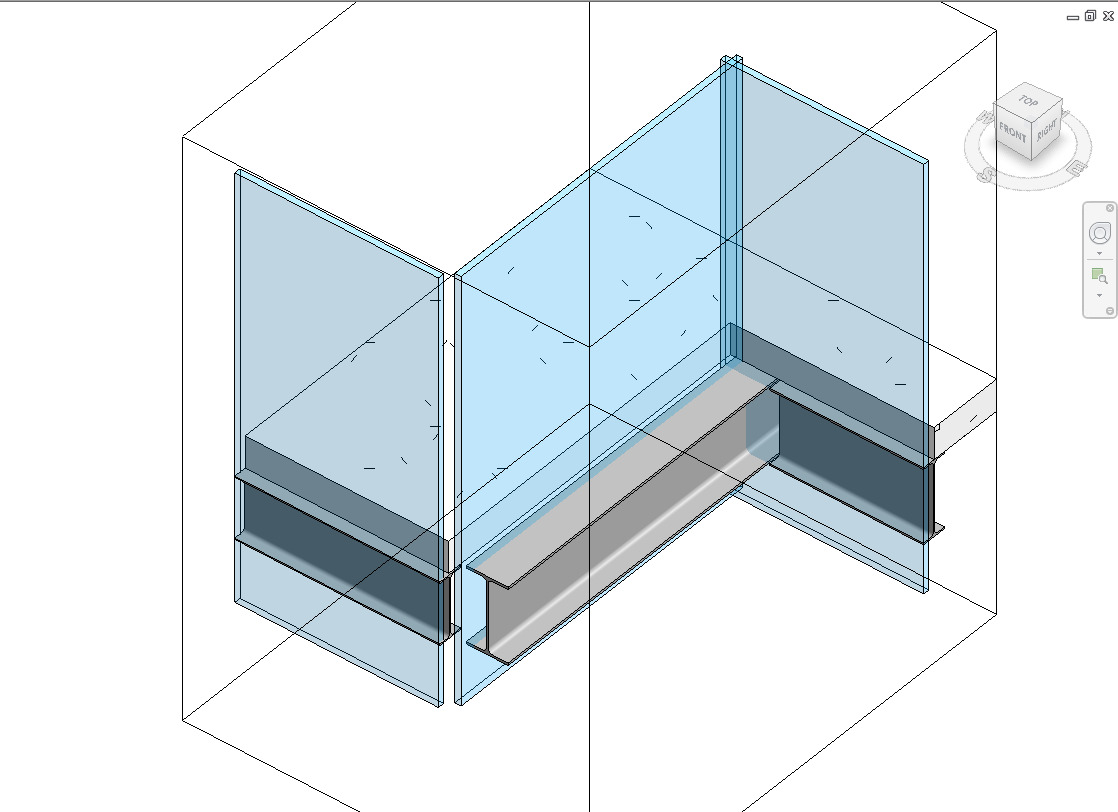
By clicking the three small dots in the issue we can expand the Viewpoint command and click Add from current view. This is going to add exactly what we see in the Revit model space to the issue.
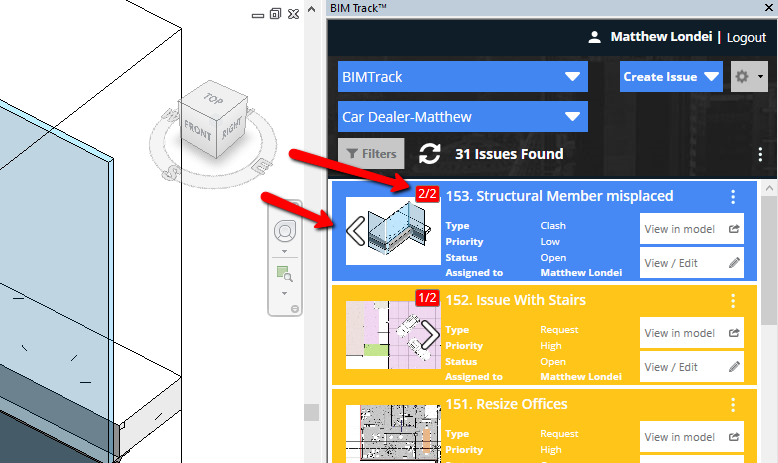
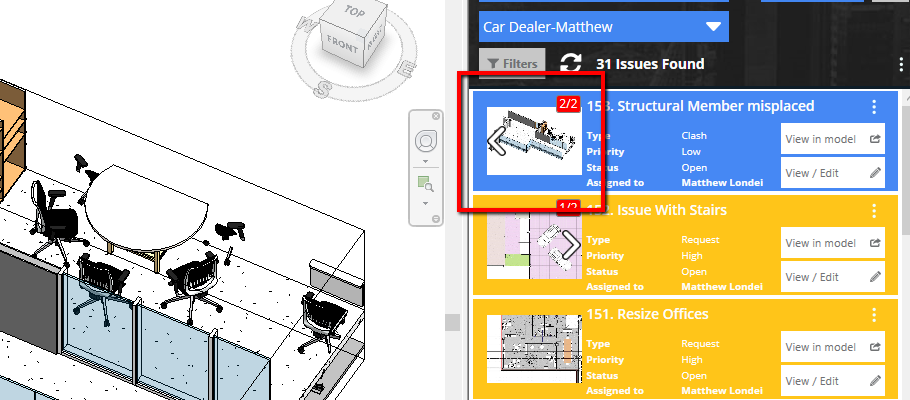
Notice the red 2/2 and the white arrow. This indicates there are multiple previews. We can now toggle between the two viewstates. When the View in Model button is pressed, you will be taken to whichever preview is showing.
Deleting a viewpoint
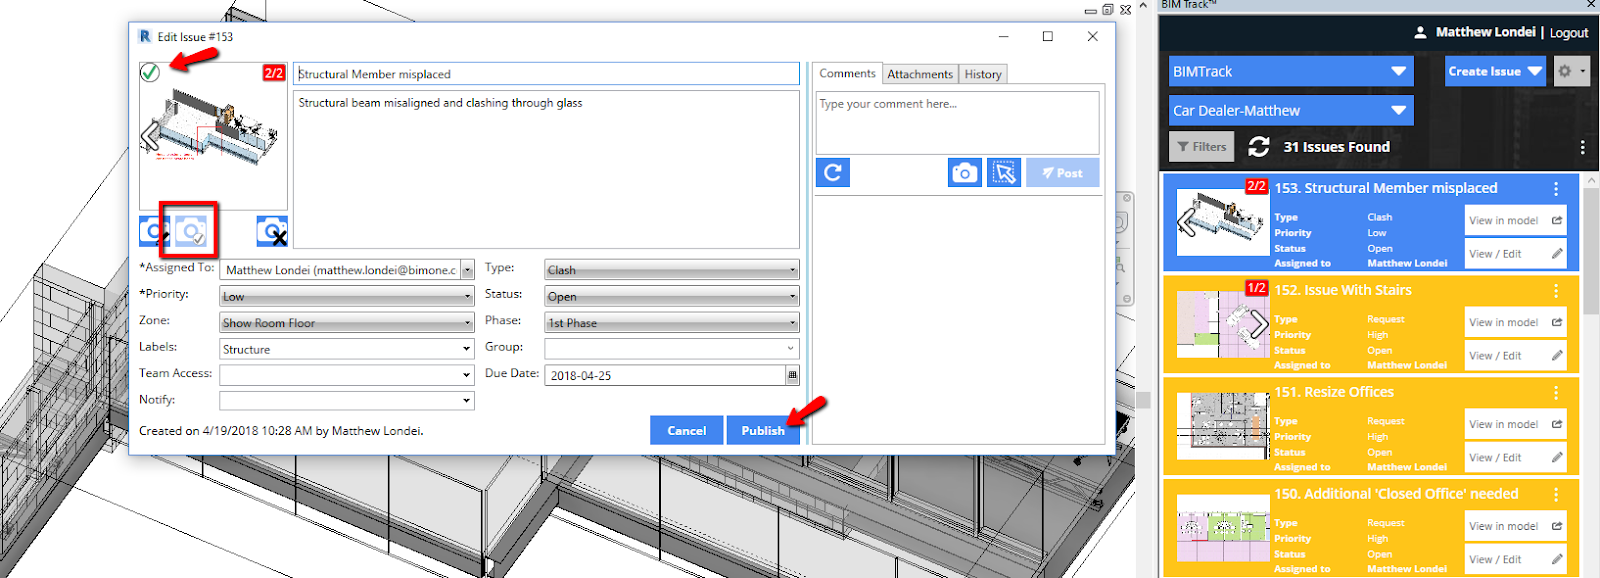
If there is a view within the issue preview images we added accidentally or simply don’t need, it can be deleted from the Edit Issue #___ dialog box. Click the View / Edit button of the issue, change the issue preview to the view you want to delete, and click the Delete Viewpoint button. Click Publish to save the changes.

Updating a viewpoint
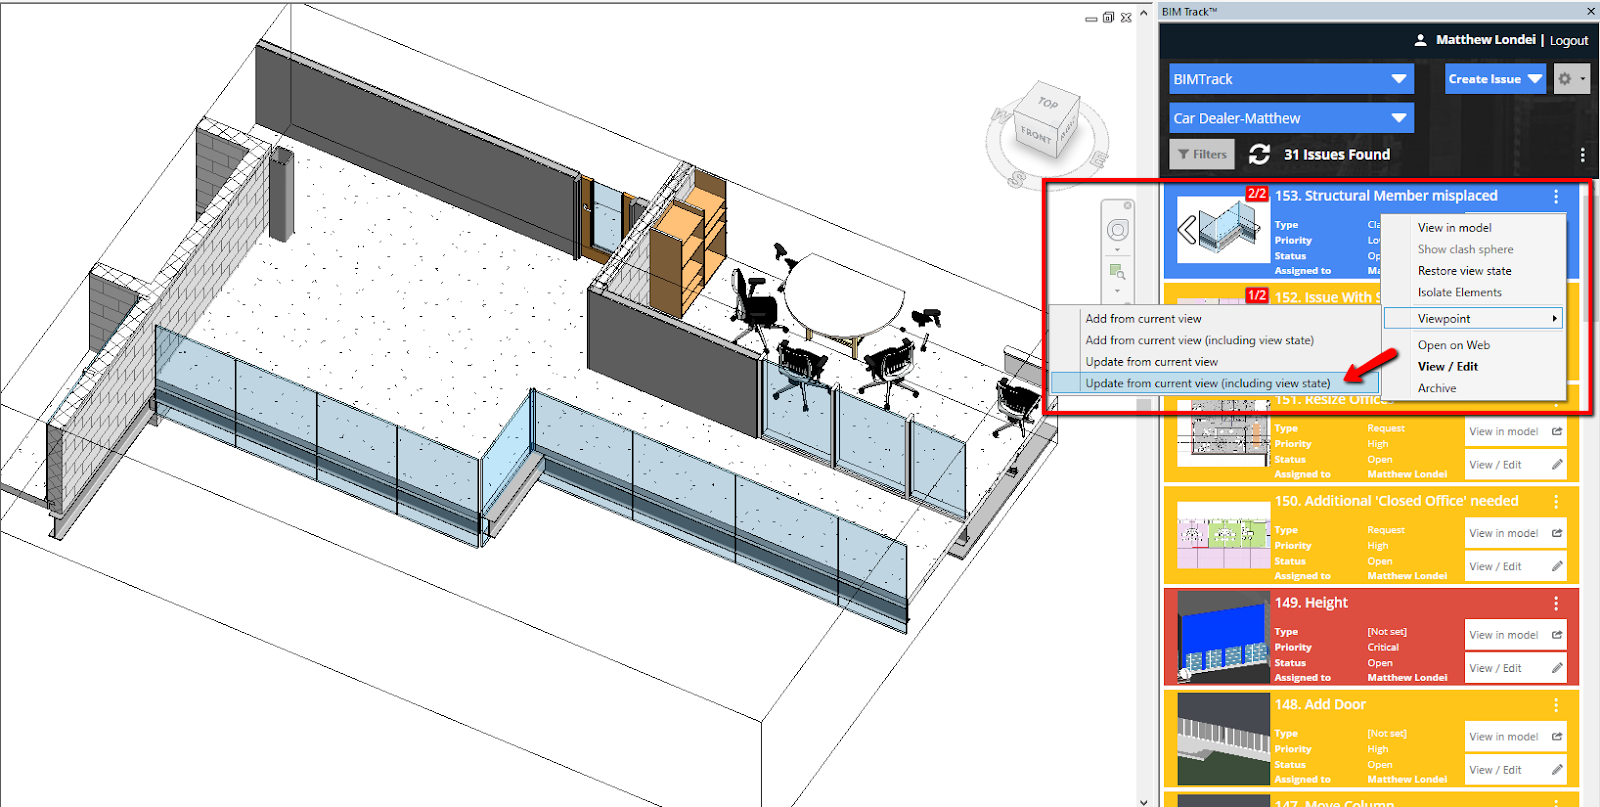
The section box was expanded to give additional context to the location and surroundings of the above mentioned issue. By clicking the three small dots again, expanding the Viewpoint commands and selecting Update from current view the issue image is updated. We won’t need to expand the section box the next time we view this issue.
Annotating a viewpoint
Additional markups can be added to a preview image from the Edit Issue #___ dialog box. Click the View / Edit button of the issue, change the issue preview to the view you want to annotate and click the Image Editor button. You will be taken to your default image editor where you can add any kind of additional annotations or markups.
Setting the default viewpoint
To facilitate the viewing of an issue while working in the multiple supported platforms, the default preview image can be changed. This will take the user to that specific view including its view state properties. Click the View / Edit button of the issue, change the issue preview to the view you want to set as default and click the Set as default viewpoint button.
For more information, watch this video.