
Project Management Overview
Projects allow you to organize your issues. If you have created or been invited into a project, you will see it on the Projects page.
Please note that only hub owners and admins can create projects (see Create a Project).
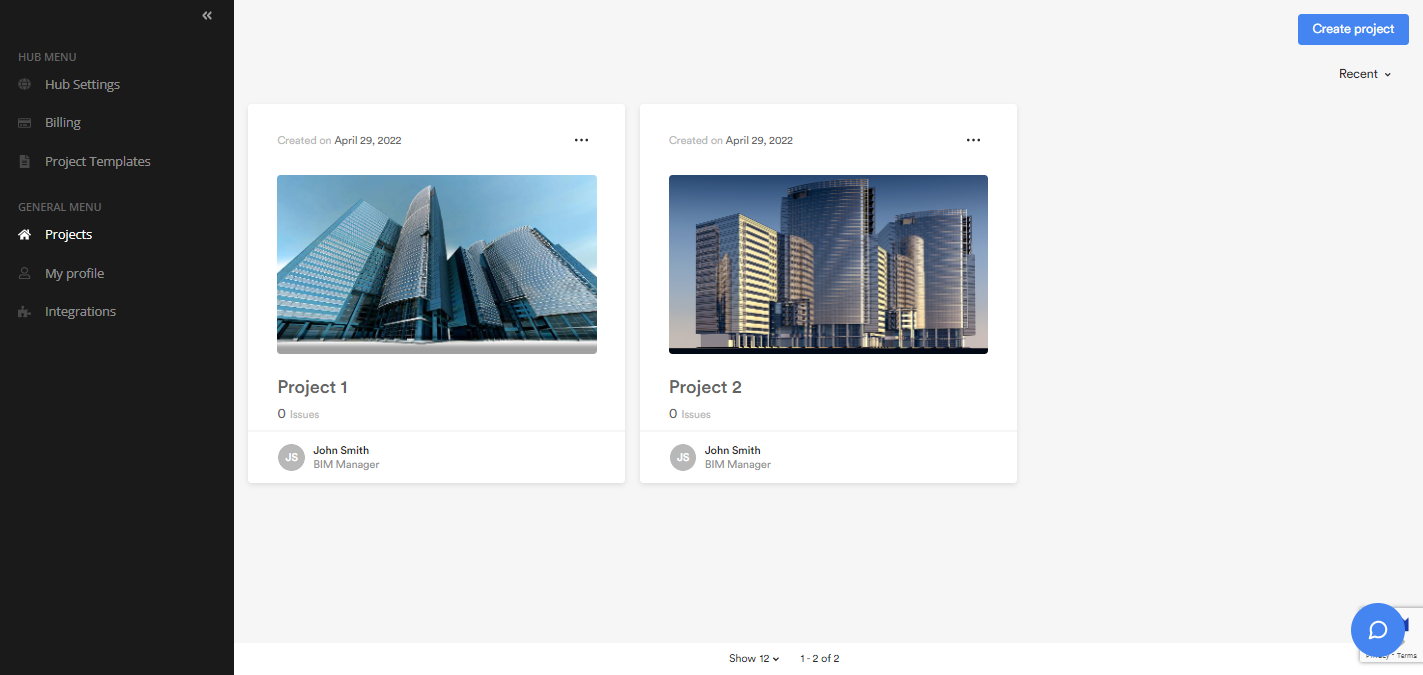
Each project is represented by a tile that indicates the creation date, the issue number, as well as the project number and creator. You can also display projects as a list by clicking on the list icon in the top right corner of the page. You can sort the Name and Last opened columns (your recent projects) to find a project more easily.
To open a project, simply click on its tile. Clicking on the three-dot icon in the upper right corner of the tile will also take you to the following options:
- Project settings – redirects to the project settings (with the necessary access rights)
- Teams and users – redirects to the teams and users (with the necessary access rights)
- Leave – allows you to leave a project you have been invited to
- Complete project – allows you to mark the project as completed (with the necessary access rights)
- Delete – allows you to delete the project (with the necessary access rights)
If the hub contains multiple projects, you can use the search bar or sorting options in the upper right corner of the page to find a project more easily.
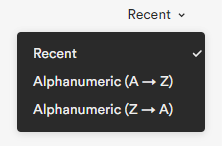
By default, projects are sorted by Recent. If you open multiple projects in the same day, your recent projects will be displayed in alphanumeric order.
For more information on projects, see the other articles in this section.