Teams and Users
From the Teams and Users page, found in the PROJECT MENU, you can quickly create your required teams and assign the project users to the appropriate team or teams. Teams are used to help control notifying a large number of users, restricting a team to specific statuses, or allowing complete teams access to project issues. For more information, watch this video.
Add/Remove Teams
In the top right corner click the + Add team button and define the team/company name. Click the check mark to save your newly created team. Your new team will appear in the TEAM list.

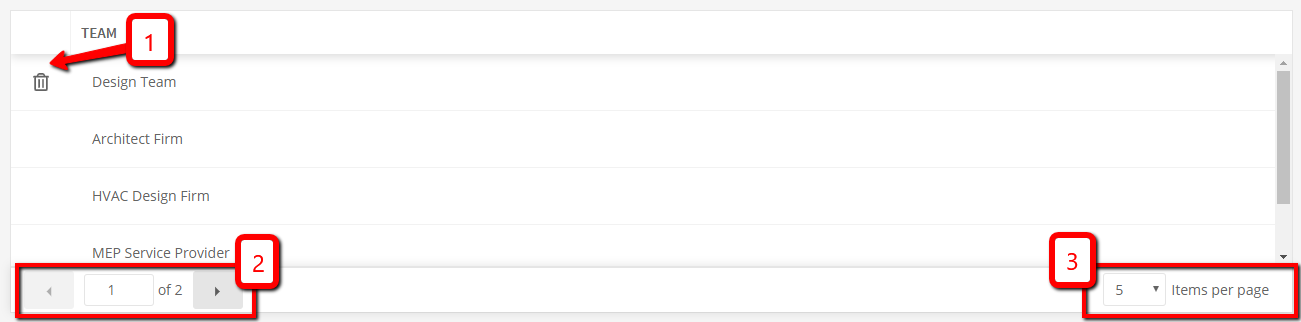
To delete a team simply click the trash can icon at the beginning of the team name (1). Along the bottom of the TEAM panel you can scroll from one page to the next (2) and control how many teams are displayed per page (3).
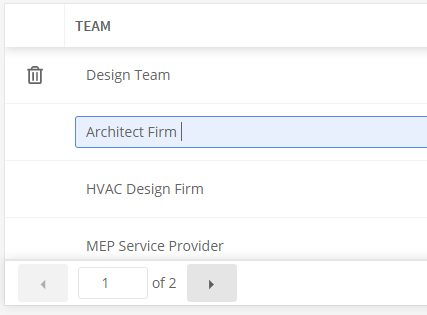
By clicking on any team name, you can rename it when the row turns blue.
Add/Remove Users in a Team
In the USERS section you will find the members of your Hub that you assigned to the project. If you need to add additional users from the hub to this project simply click the +Add user button, and from the drop down that appears, select the name of the user, place them on a team(s), define their role and click the blue check mark at the start of the row.
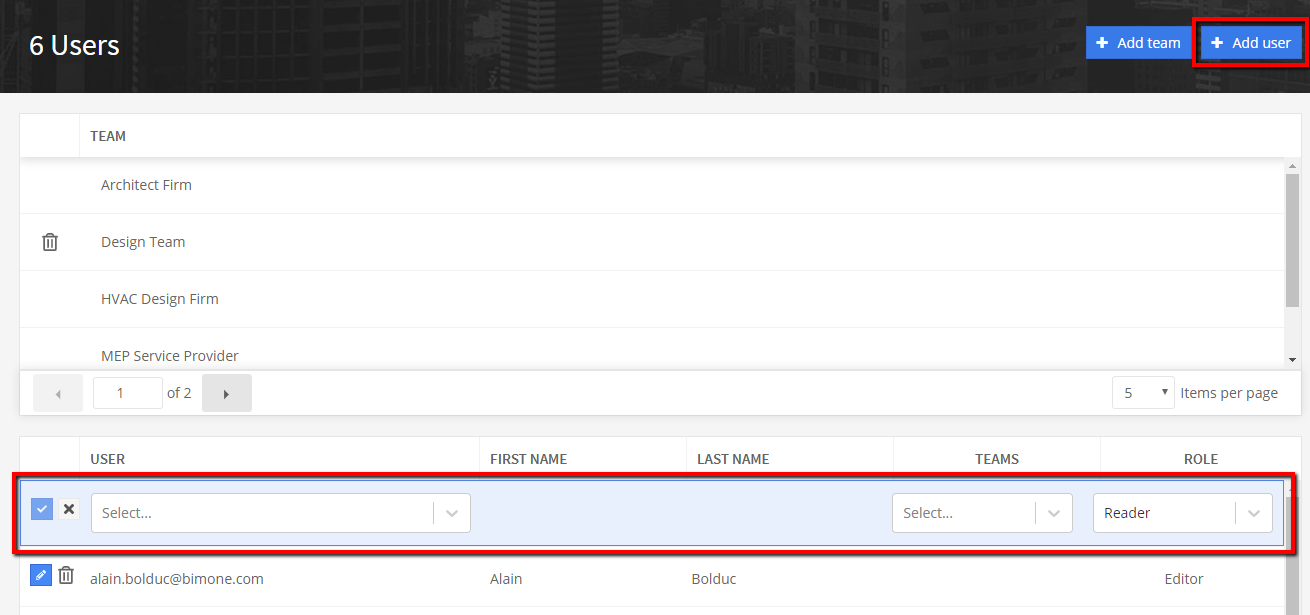
This user is now on the project, assigned to the desired team(s), and has the specific role you want that user to have.
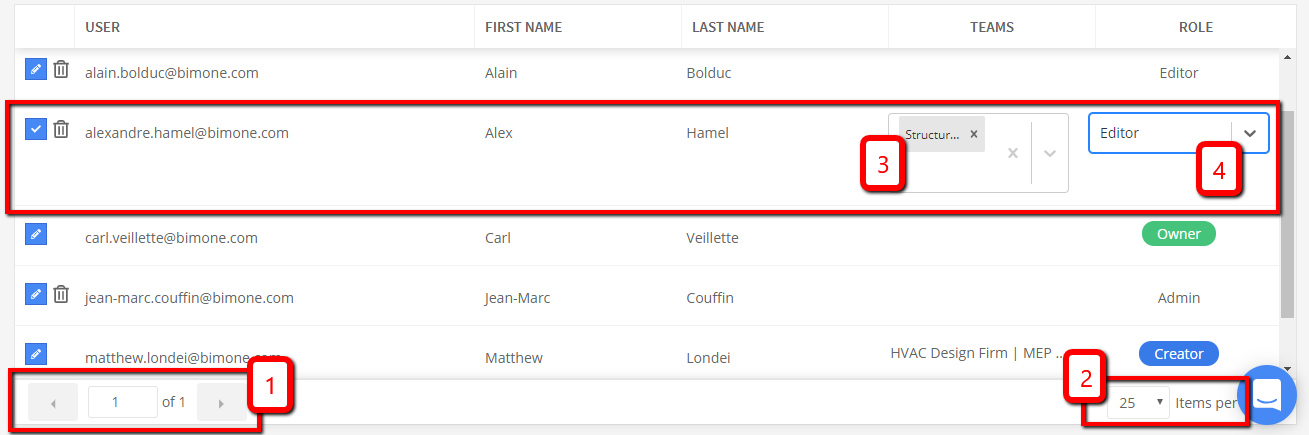
Along the bottom of the USERS panel you can progress through the pages (1) and define how many users you want displayed on each page (2). By double clicking on a user’s name you can configure their current teams (3) and their project role (4). To remove a user from the project click the trash can at the beginning of their row. They will be removed from the project but remain in the Hub.
Project Roles
assigning a role to the newly added user allows for certain access to specific portions of Newforma Konekt and specific commands. There are three roles to choose from and each has their own restrictions.
- READER: A reader has very little access and can essentially only download and view the project from the online viewer. This role is not for the typical user.
- EDITOR: Most commonly given to the BIM modeler. This role allows for issue creation and merging but doesn’t allow for issue archiving. A very good combination of settings.
- ADMIN: If you are not the hub owner but can add users it’s because you are the project creator or have been given an admin role. If giving a user an admin role it’s because this user can and will be archiving issues, deleting issues, and updating project settings.
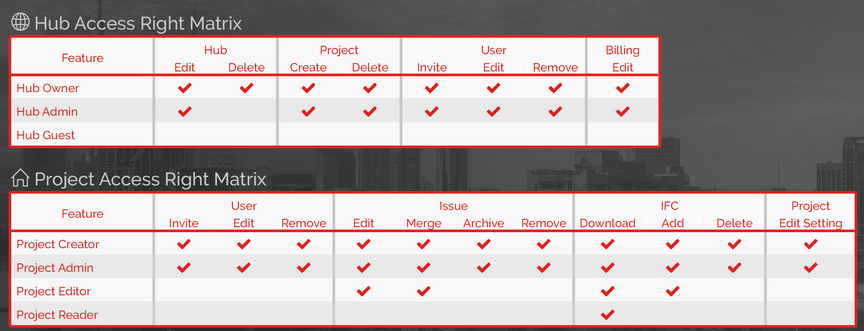
Here’s the access rights matrix. It will help clarify the roles and what each can perform: