
Project Settings
Identification
In the Identification section, you can modify the project number, as well as the start and end date. The start and end date are for information purposes only and have no impact on access to the project.
Configurations
In the General settings section, you can set the default due date, default issue color attribute and the mandatory issue attributes. We recommend setting Assigned to and Priority in the Issue Mandatory Attributes field. To do this, or make any other modifications, click the pencil button at the end of the row and select the desired criteria.
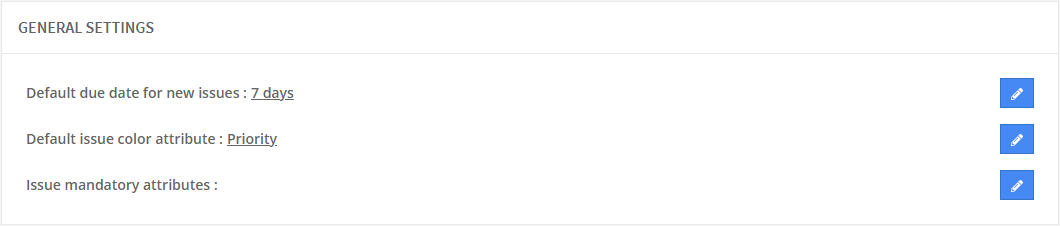
These settings will be available for customization at any point in the project.
Issue Attributes
The attributes in the project settings are reflective and definitive of your actual project. They are usually defined in a BIM execution plan prior to project commencement. With the exception of the disciplines attribute, all issues can have one attribute associated to it.
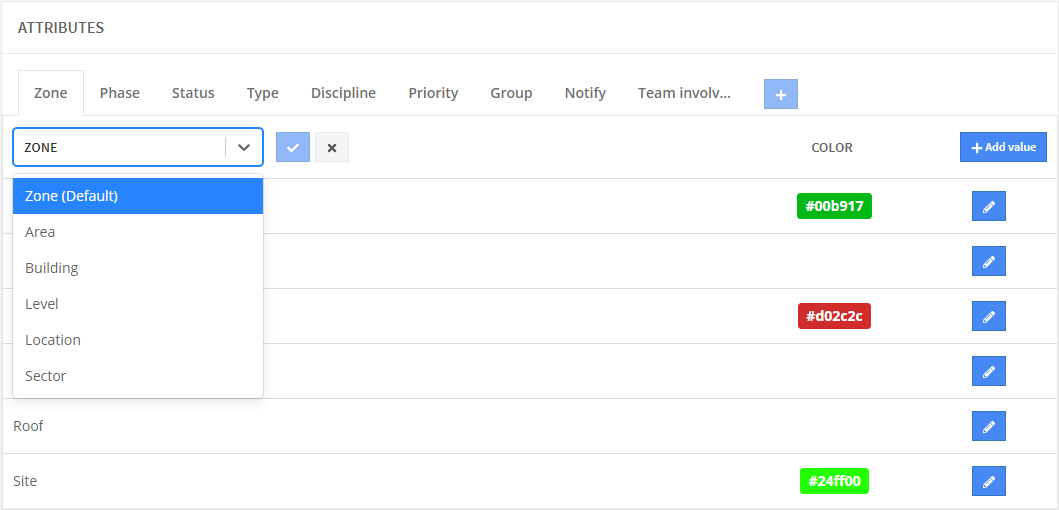
You can modify the names of the Zone, Phase, Discipline, Priority, Notify and Team involved attributes. To do so, click on the name of the attribute you wish to rename and then click on the edit icon to its right to select one of the predefined names from the drop-down list (see Renaming Issue Attributes).
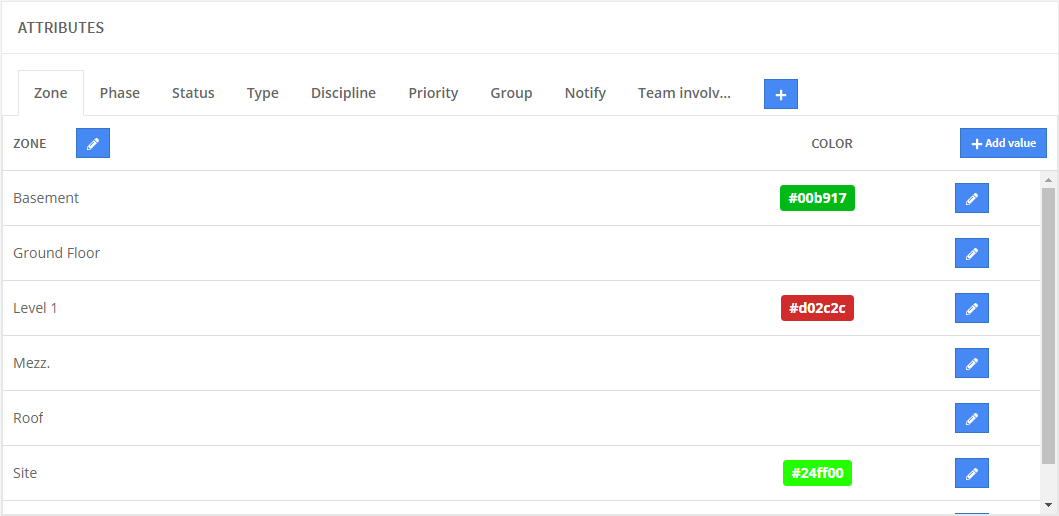
Zones
The Zone attribute, which can be renamed Area, Building, Level, Location or Sector, is user defined and color coded. The naming convention of your zone will depend on your project. For a high-rise type building you may use each level/floor as a zone. For a project with multiple buildings you may want to create a zone for each individual building. When you add a zone, by clicking the button in the top right corner you give it a name, select its color, and you have the option of setting it as default. This automatically places this zone into an issue being created.
Phases
Create multiple phases within your project by clicking the + Add Phase button in the top right corner. Phases define the stage in which that issue is found or will occur.
The Phase attribute can be renamed Sequence or Stage.
Status
Add additional statuses to your project. The Closed status cannot be deleted from a project. The Open status is already set to default for you. It is good practice to leave this option selected to reduce clicks. Teams can be given access to specific statuses in the Restricted to column. This grants certain teams access to that status. For example, we could give just the Project Coordinator Team access to the ‘closed’ status. Forcing all other users to switch open issues to ‘resolved’ prior to be checked and then switched to ‘closed’.
Types
Types indicate what kind of issue we are looking at. Issues can be recorded as clashes, code violations, requests, finance, solutions, etc.
Disciplines
The Discipline attribute, which can be renamed Label, Trade or Work package, is the only attribute that allows for multiple field selection. We are essentially stamping all the disciplines that may be involved on that specific issue. This allows us to cross reference issues when applying filters to our issues page.
Priorities
The priority attribute, which can be renamed Importance or Severity, refers to the priority assigned to an issue and indicates its severity in the project. The level of concern is also defined in a BIM Execution plan. The colors of the issue priority are commonly used to display our issues because with a quick glance we can see the more severe issues we need resolved.
Group
Group is a bit like a tag. This field is not predefined in Newforma Konekt’s project settings. Usually our clients are adding the clash test name from Navisworks’ clash detective, or a coordination meeting name / date to create reports for meetings or a specific groups of issues.
Notify
This is the Newforma Konekt equivalent of cc’ing someone in an email. They will be notified of all changes. Teams or individuals who have access to the issue can be selected under the notify column.
Team involved
This allows you to identify the team(s) involved in an issue, allowing you to assign teams to it.
Custom Attributes
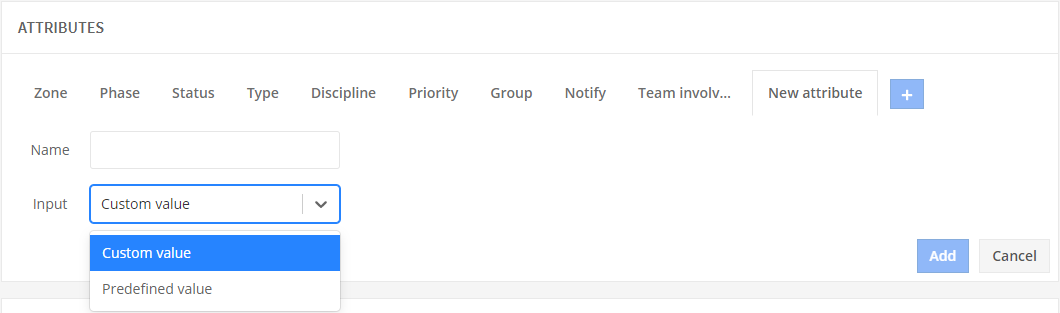
The ability to add up to 6 custom attributes is possible by clicking the Blue Plus button at the end of the attribute row and defining the needed attribute’s name. Fields such as Cost and Grid are popular among the custom attributes added to a project.
Custom vs. Predefined Value
You will have the ability to select between a custom value or lay out your own predefined values for your new custom attribute. The custom value option allows your contributors to type in their own values during the issue creation process. If you’d rather list out the values that a user can select, similar to the pre-existing attributes, choose the predefined value and fill out the attributes as you did earlier.
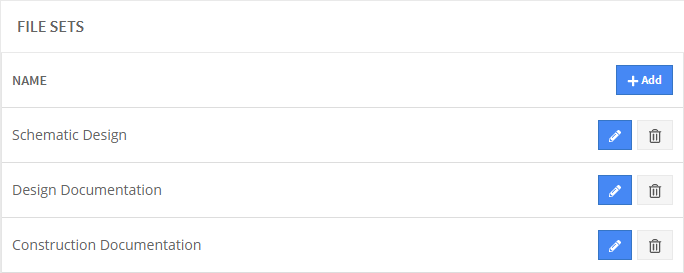
File sets
In the File sets sections, you can create file sets so that NextGen Viewer and Revit users can use them to organize sheet versions more easily during the design review process.
If you’re using the default Newforma Konekt project template, three files sets are already created for you.
For more information, see Create and Manage File Sets.